Support


Help & Setup

Using CuteFTP To Upload

CuteFTP is popular File Transfer Protocol (FTP) software from GlobalSCAPE which is available on both Windows and Macintosh platforms.

This tutorial covers the basics of uploading your website using GlobalSCAPE's CuteFTP for Windows. The following screen shots are taken with CuteFTP 7.1 XP, but they should be very similar for users of later versions and different operating systems.

Download CuteFTP Software.

Getting Your FTP Settings
You will need to have your FTP settings on hand in order to use Windows XP Network
Places to upload your Website. Please check your confirmation setup email for the login information:

  • FTP User Name
    This is the user name for your hosting account.

  • FTP Password
    This your password for your hosting account.

  • Website URL
    http://www.yourdomainnamehere.com

  • FTP Site URL
    ftp://www.yourdomainnamehere.com
How to use CuteFTP

1. Start CuteFTP.
2. Click File and scroll down to New. Click FTP Site.
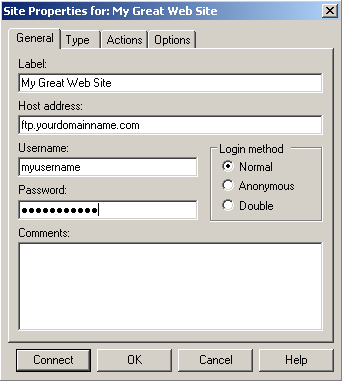


3.

Complete these fields in the Site Settings window:
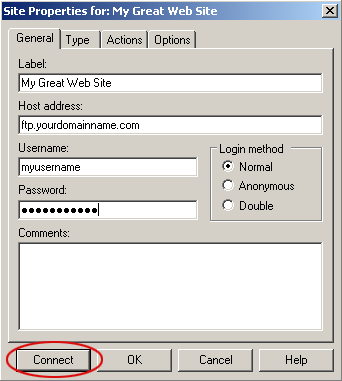
  • Label: Type a name for your website eg: My Great Website
  • Host Address: ftp.yourdomainname.com
  • Username: yourusername
  • Password: yourpassword
  • Login Method: NORMAL


4. Click Connect.


Uploading Files to Your Web Folder
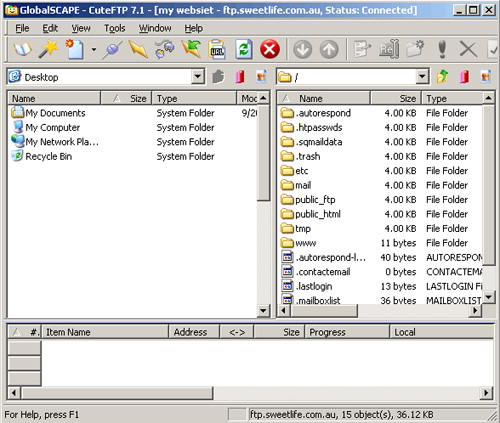
1. The CuteFTP main window, which is used to transfer files to and from your Website will display.


2.

The left frame is your local computer file list. Locate the files and/or directories on your local file list.
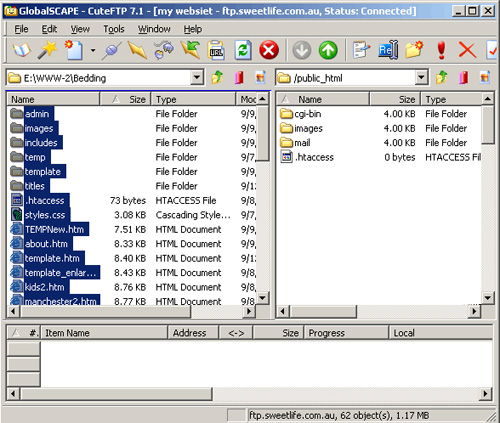
The right frame is your Web server files list. Locate the public_html directory on your web server file list. Double click to open it.

  • NOTE: All files must go in the public_html folder. Do NOT place any other files anywhere but here.

  • NOTE: Your home page file name MUST be labelled index.htm or index.html. The server will try to find this page to display as your first page.


3.

Select the local computer files (on the left) you wish to transfer


4.

Click the upload button to send files to the web server public_html directory.

  • NOTE: If you want to download files from the website server, select files in the server window (on the right) and click the download button.
5.

The uploaded file will appear on the web server.

* If changes are not visible after you have uploaded new content to your website, please try clearing your browser cache or temporary Internet files and load the page again.